





How to Remove UV DTF Stickers Without Damaging the Surface
A UV DTF sticker that lands a half inch off center is a small heartbreak. The design looked perfect on the screen, it went down crooked, and now it feels welded to the blank. The instinct is to grab a corner and pull hard. That is also the fastest way to tear the film, leave a sticky ghost behind, and scratch the surface you were trying to save.
Removal works best when you treat it as a slow, three-part job: soften the adhesive, lift the film gently, then clean up whatever is left. The exact tools depend on the blank, but the order rarely changes. What follows is a practical walkthrough built around the methods makers actually use, plus the safety checks that keep a blank from becoming scrap.
Why UV DTF Stickers Resist Removal
Craft Express lists UV DTF transfers in its catalog as permanent stickers and decals, and that permanence is the whole point. These designs are built to hold on tumblers, glass cans, and other hard blanks through daily handling without curling at the edges.
The same grip that makes the decal durable makes a misplacement annoying. The transfer film is thin, so a hard pull stretches or rips the design instead of releasing it. The adhesive layer underneath can stay put in a gummy patch even after the film comes away. And because the decal sits tight against the surface, there is no loose edge to grab until you create one.
That means force is the wrong tool. Heat, solvent, and patience are the right ones.
Gather Your Tools Before You Touch the Sticker
Makers who remove UV DTF transfers regularly tend to keep a small kit together. Having everything within reach matters, because you want to work while the adhesive is still warm or still softened by solvent.
A hairdryer or a heat gun for softening the adhesive
A heat press, if you have one, for even and consistent warming
An adhesive remover such as Goo Gone
Cotton pads or a soft cloth for applying solvent
A utility knife used flat and at a low angle to lift an edge
A tumbler cradle to hold a curved blank steady
Mild soapy water and a clean towel for the final wipe down
The tumbler cradle is easy to overlook and genuinely useful. A blank that rolls while you are trying to lift a thin edge is how blades slip and how designs tear.
Step One: Spot Test Every Solvent
Before any adhesive remover touches the design, test it somewhere hidden. Dampen a cotton pad or cloth with the remover, press it onto an inconspicuous part of the blank for one to two minutes, and wipe. If the finish dulls, clouds, or lifts, stop and use heat only.
This check matters most on coated, painted, or printed surfaces, where a solvent that is harmless on bare glass can soften a decorative finish. Testing costs a couple of minutes. Replacing a ruined blank costs the blank and the design.

Step Two: Apply Gentle Heat to Soften the Adhesive
Warmth is the safest first move on most surfaces. Hold a hairdryer or heat gun about three to four inches away from the transfer and move it steadily across the design. Do not park the nozzle in one spot. A heat gun runs far hotter than a hairdryer, so keep it in motion and check the film with your fingertip as you go.
When the decal relaxes and the edge starts to look willing, slide a utility knife flat under a corner and lift just enough to grip. Peel back slowly at a low angle, close to the surface rather than straight up. If resistance builds, stop, apply more heat, and start again. Rushing is what tears the film.
On plastic tumblers, keep the heat moving and stay conservative. Plastic softens faster than the adhesive does, so the goal is warm, not hot.
Step Three: Use a Heat Press for Even, Consistent Warming
If you own a heat press, it is often the easiest and most consistent option because the heat arrives evenly across the whole decal instead of in one moving hot spot. The approach is simple: brief contact, low pressure, then lift and test a corner.
Work in short passes rather than one long press. Check the edge after each pass, and stop as soon as the film releases. A press also frees both hands, which makes it easier to peel evenly instead of fighting a blank that wants to slide.
Step Four: Reach for an Adhesive Remover
When heat alone will not budge the decal, or when the film comes away and leaves adhesive behind, an adhesive remover such as Goo Gone does the heavy lifting. Dampen a cotton pad or cloth, press it onto the sticker, and let it sit for one to two minutes before wiping.
On glass, this solvent approach is one of the more reliable routes, and it is gentle enough to avoid scratching. On curved or textured blanks, saturate the pad fully and hold it in contact rather than scrubbing. Once the adhesive softens, the film usually lifts with light persuasion from a flat blade.
Method |
Best For |
Watch Out For |
|---|---|---|
Gentle heat from a hairdryer or heat gun |
Most hard blanks, especially plastic tumblers |
Overheating plastic; holding the nozzle too close |
Heat press |
Even warming across a full decal |
Long passes that over-soften the blank |
Adhesive remover on a cotton pad |
Glass and stubborn adhesive residue |
Damaging coatings if you skip the spot test |
Vinegar soak |
Experimentation on tough oopsies |
Unpredictable results; always test first |

Step Five: Try the Vinegar Soak as an Experiment
One creator shared a hack for removing UV DTF mistakes by soaking the piece in vinegar. It circulates in maker circles as a low-cost option, and it is worth trying on a test blank before you trust it with a finished project.
Treat it as an experiment rather than a promise. Results vary by adhesive, by surface, and by how long the decal has been curing. Spot test first, keep the soak short, and check progress often.
What Not to Do When Removing UV DTF Stickers
Most damage during removal comes from a handful of avoidable moves. Skipping them saves blanks.
Do not yank the film straight up. Peel low and slow, and reheat when it fights back.
Do not dig with the tip of a blade. Lay the blade nearly flat and use it to lift, not gouge.
Do not flood a plastic blank with solvent. Apply it to a pad, not the surface.
Do not scrub with an abrasive pad, which can leave fine scratches that show up later.
Do not stack heat and solvent at the same moment on a delicate finish. Do one, check, then the other.
Surface Notes for Glass, Plastic, and Coated Blanks
Glass is the most forgiving surface in the group. It tolerates solvent well, wipes clean easily, and rarely scratches from a cotton pad. A one to two minute solvent soak followed by a gentle wipe handles most glass decals.
Plastic tumblers call for a lighter touch. Heat is usually the better first step, applied in motion and kept moderate. Solvents still work, but apply them to the pad and test the finish first, since some plastics react to strong removers.
Coated, painted, or printed blanks deserve the most caution. Spot test everything, keep heat moderate, and stop the moment a finish looks dull or tacky. When in doubt, contact the blank supplier for guidance on what its coating tolerates rather than guessing.
Clean the Residue and Prep for a Fresh Decal
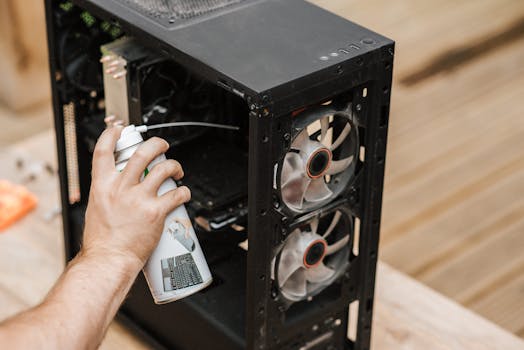
Once the film is off, the surface can still carry a thin film of adhesive that you cannot see but can feel. Wipe the area with adhesive remover, then wash with mild soapy water and dry completely.
This step is not optional if you plan to reapply. Any residue left under a new UV DTF transfer weakens the bond and can show as a hazy patch under the design. A clean, fully dry surface gives the replacement its best chance.
Preventing the Next Do-Over
The cheapest removal is the one you never have to do. Dry fit the decal before you commit, line it up against a straight reference, and check placement from more than one angle. A tumbler cradle keeps a round blank from shifting mid-application.
Keeping a spare blank on hand also changes the stakes. Mistakes become a small detour instead of a deadline problem, and you can take the slower, safer removal route instead of forcing a peel you will regret.
Frequently Asked Questions
Can I remove a UV DTF sticker and reuse it?
Usually not. The adhesive layer deforms when it releases, and the thin film is easy to stretch during removal. A decal that comes off in one piece may still fail to bond cleanly the second time. Plan on replacing the design rather than reinstalling the original, and keep spare transfers for exactly this reason.
Will heat from a hairdryer damage a plastic tumbler?
It can if you hold the nozzle close and stay in one spot. Keep the dryer or heat gun three to four inches away and keep it moving across the design. Plastic softens faster than adhesive releases, so warm the decal gradually, check the edge with your fingertip, and stop as soon as the film begins to lift.
What should I do if adhesive residue stays on the blank?
Dampen a cotton pad with an adhesive remover such as Goo Gone, press it onto the residue for one to two minutes, and wipe. Repeat as needed rather than scrubbing hard. Finish with mild soapy water and dry the surface completely before applying anything new, since residue under a fresh decal weakens the bond.
Does the vinegar soak really work on UV DTF stickers?
It circulates as a maker hack, and one creator reported success soaking UV DTF oopsies in vinegar, but results are not consistent across adhesives and surfaces. Test it on a scrap blank first, keep the soak short, and check progress often. If the decal does not loosen, switch to gentle heat or an adhesive remover.
Is it safe to use a utility knife to lift the edge?
A utility knife is a common tool for this job, but technique decides whether it helps or harms. Lay the blade nearly flat against the surface and use it only to lift a softened corner, never to dig or pry. Keep the blade angled away from the design, hold the blank steady in a cradle, and let heat do most of the work.

Leave a comment
This site is protected by hCaptcha and the hCaptcha Privacy Policy and Terms of Service apply.